Round Towers
Evolution

Attempt 1
Maya
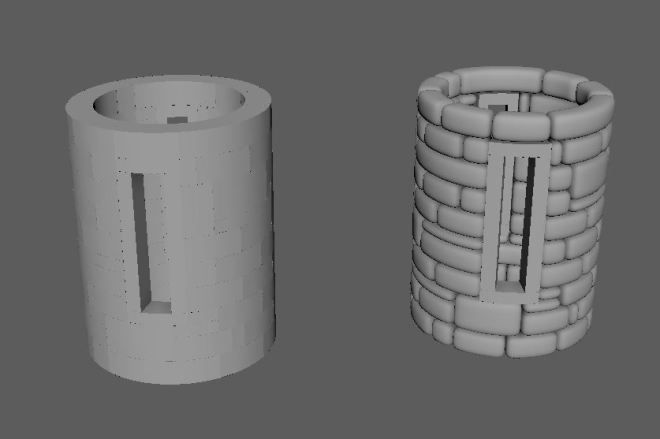
Modelling the round towers was a very similar process to modelling the main walls. I started off by modelling a series of irregular shaped bricks in Maya with really simple geometry. I then assembled these bricks into a flat wall. I found that enabling Smooth Mesh Preview really helped to visualise what the bricks would look like when completed, and thus creating an irregular-looking pattern was quite straightforward. I also modelled a flat plane to use as mortar.


I then grouped this wall, and used a bend deformer to curve the wall into the shape of the round tower.
Sculpting the Stones in ZBrush
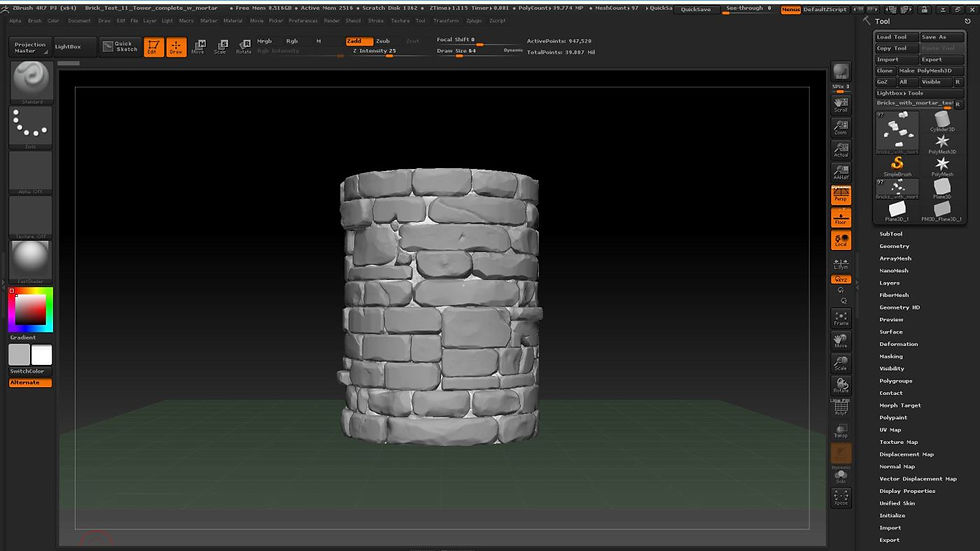
Once the round tower had been deformed in Maya, I disabled Smooth Mesh Preview and exported this mesh as an FBX. I then brought this into ZBrush where I could sculpt the bricks in a similar way to the original flat walls and the exact same techniques for both. I used a variety of brushes to create the desired effect - I used the Trim Dynamic brush to soften off and damage the edges:

Trim Dynamic
Z Intensity = 100
Focal Shift = ~ -100
Draw Size = ~ 20
I also used the Planar brush to give sharper edges in certain areas:
Planar

Z Intensity = ~ 100
Focal Shift = ~ -25
Draw Size = ~ 110
To add detail, I used the Orb Cracks brush (from Michael Vicente's fantastic Orb Brush pack):
Orb Cracks
Z Intensity = ~ 17
Focal Shift = 0
Draw Size = ~ 26
I also used the pinch brush to tighten up any crack detail, to give a sharper and more stylized aesthetic.
Pinch

Z Intensity = ~ 10
Focal Shift = 0
Draw Size = ~ 26
I then used all of these various sculpting techniques to sculpt the round tower in ZBrush. The idea was that this tower could be used for all 4 corner towers, and could be rotated to hide any repetitions.


Finally, I decided to pull out a number of bricks to add some variation to the silhouette of the tower (as seen below). This breaks up the hard cylindrical edge a little, while still keeping the mesh very low in resolution.


Baking the High Detail to a Low Poly Cylinder
In an attempt to keep the resolution of the mesh as low as possible, I decided to bake the majority of the detail onto just a cylinder, and to only add resolution to the protruding bricks, which I had decimated in ZBrush. I then baked the detail from the high poly to the low poly in Substance Painter. Finally, I applied the same smart material that I had previously applied to the walls.


Round Tower Tops
I then decided to create the tops of the round towers, using the same techniques as discussed above. I created two different tower tops, and simply rotated them to hide any visible repetition.
I decimated each mesh in ZBrush, and reconstructed the topology in Maya to match the base of the round tower that I created earlier.

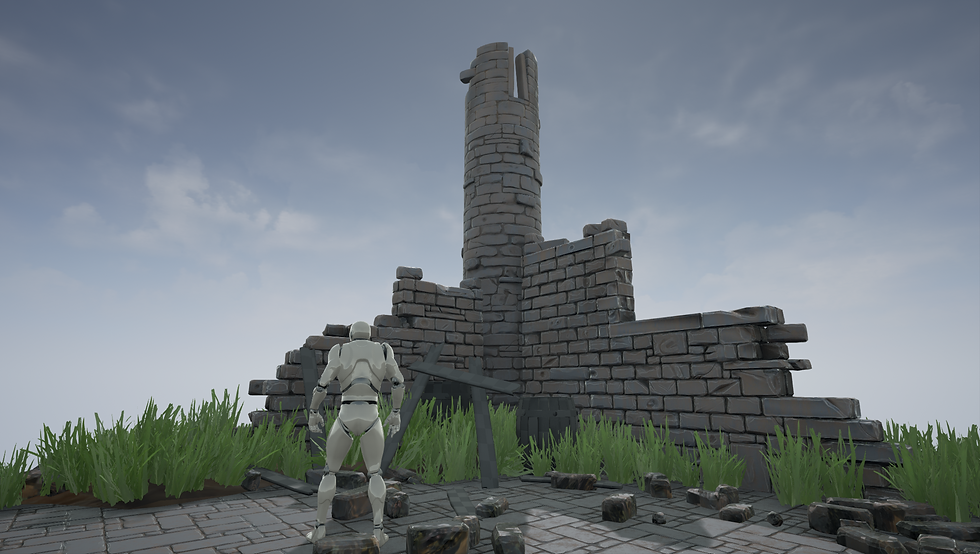
In Engine

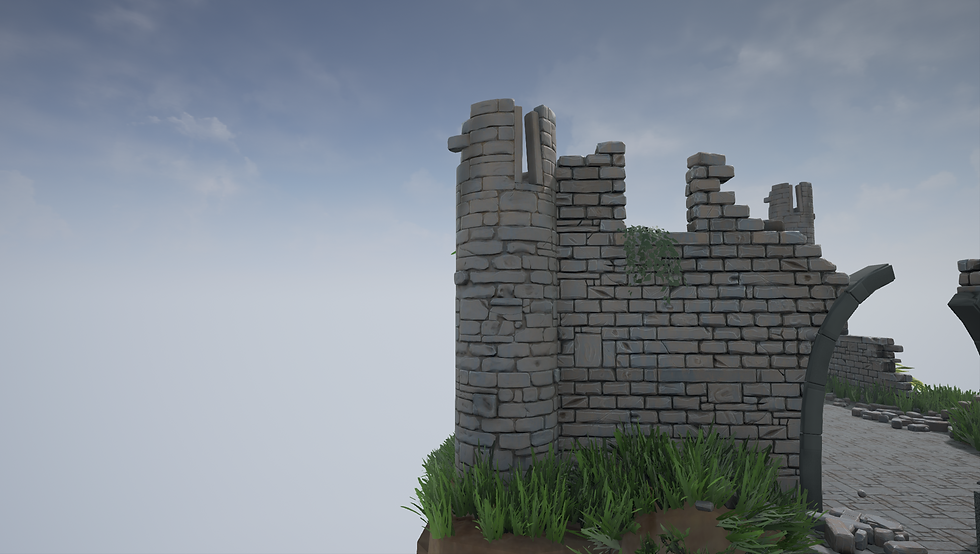
Errors
While my first attempt at creating a round tower was not a complete disaster, there are a number of areas that I wanted to improve.
Firstly, the texel density did not match the surrounding walls very well.
Secondly, the silhouette of the tower is too perfect. This is in part due to the fact that I used the bend deformer to curve the stones (which would obviously not appear as round in reality), but the primary issue for this bland silhouette is the lack of variation in the low poly mesh.
Attempt 2

Introduction
After Rare's feedback I had decided to completely change the way I approached modelling the flat walls. This then deemed it necessary to approach the round towers in the same way.
Just like with the flat walls, I wanted to add a more random and varied feel to the round towers, which would ideally create a really rugged and organic feel to the walls.
To accomplish this, I took the exact same approach as with the other walls. In fact, I used the exact same bricks that I had previously sculpted in ZBrush, and placed them in a very similar way, with some protruding more, and some covered by mortar.

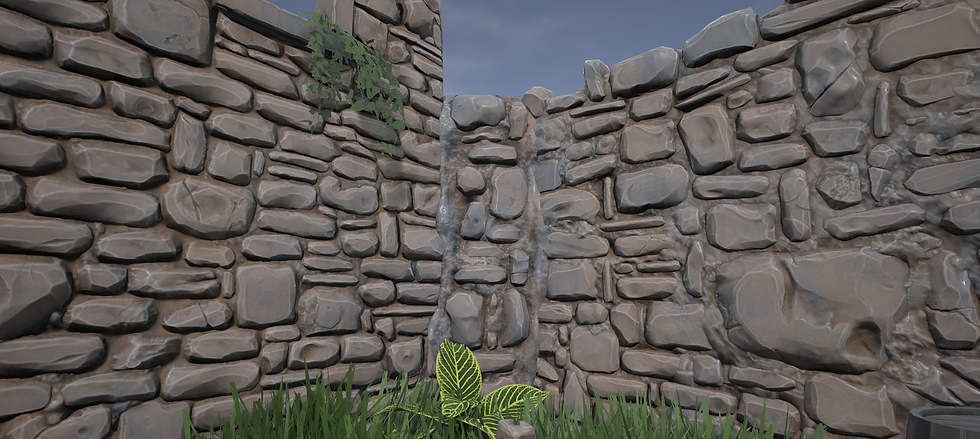
This approach was certainly progressing along the correct path. It definitely matched the surrounding walls better, and the decimated facade encouraged a more interesting silhouette, but there was still one major issue that I wanted to address - the junction between the tower and its neighbouring walls. As you can see from the below image, the junction between the walls and the tower was very flawed.

It is evident from this image that the bricks were intersecting adjacent bricks, and the mortar was not convincing. I had paid little attention to the seam between the walls and the towers because I wanted the ability to rotate them arbitrarily, but I decided to sacrifice this ability and replace it with a more specific tower element that would knit in better with its neighbours.
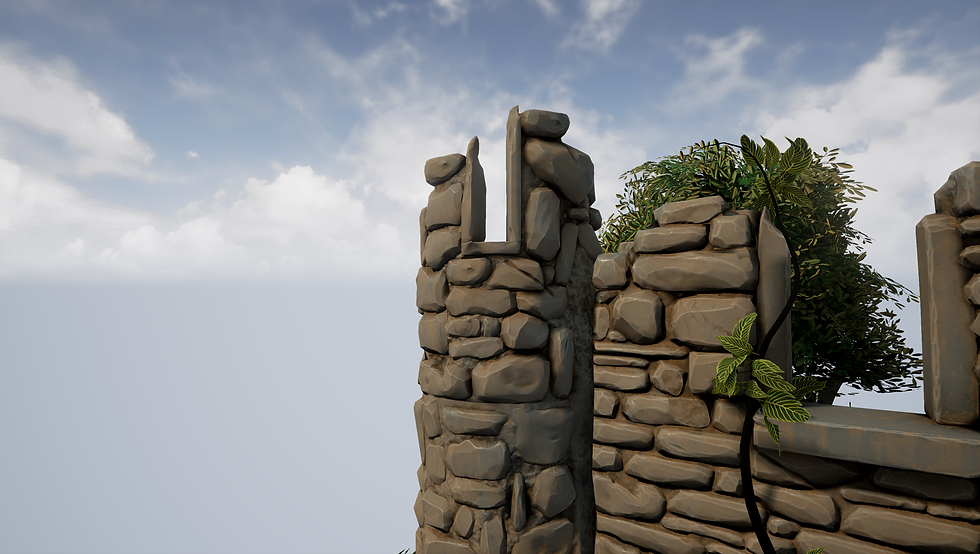
To do this I simply exported the neighbouring walls and imported them into the ZBrush document. This allowed me to examine where these two elements would meet in a much more accurate manner, and deliberately place the stones in a much more realistic way.

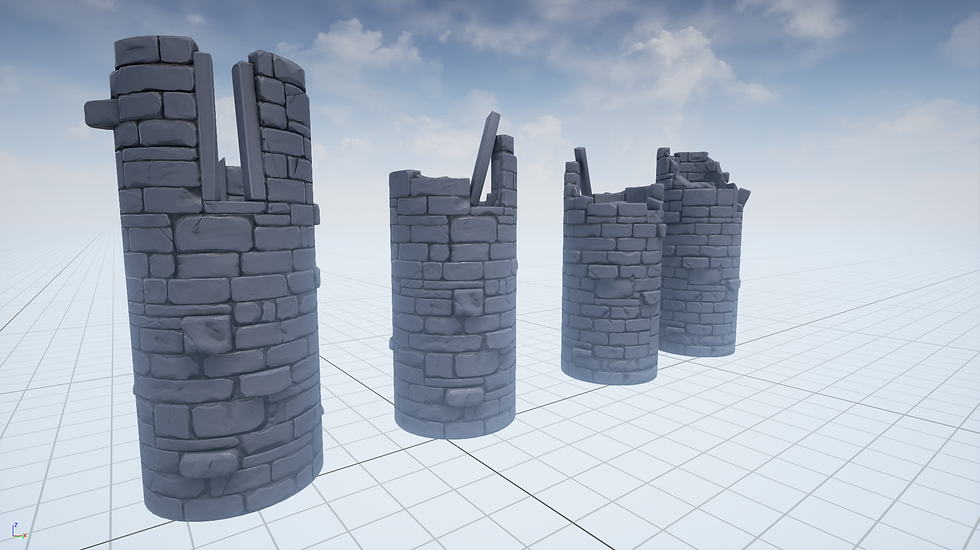
Unfortunately, the junction element is still not perfect, but it is still much better than it was originally. When towering into the sky it looks a bit strange, but it gives the impression of destruction over time at the very least.

Round Tower Tops
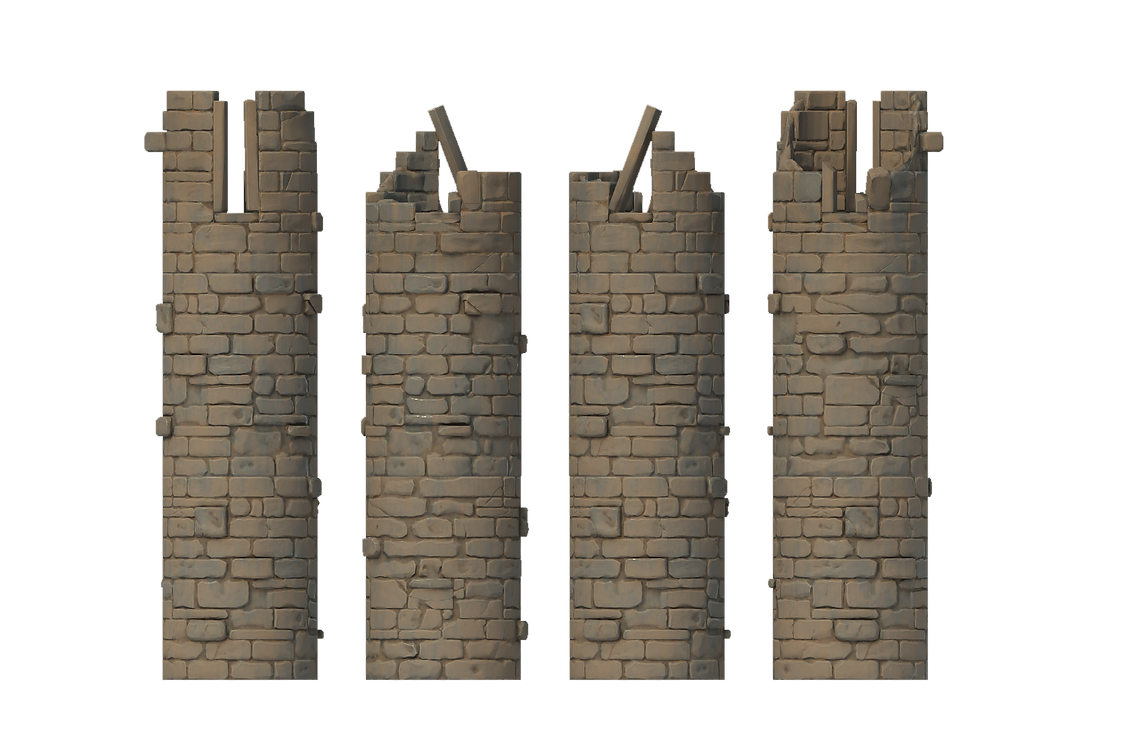
Continuing this approach even further, I modelled and sculpted two tops to fit on top of the base I had sculpted previously. Similarly to the first attempt, I modelled two variations of tower tops, and just rotated them to mask any visible repetition.


What I Would Change
These towers are much more succinct, and they complement the surrounding walls much better, but there are of course a number of areas where these walls could be improved.
The first issue I have with these round tower is that the seam between the base and the top is a still quite obvious. This was a particular challenge because the rocks were so much more irregular in this attempt, and the junction as a result is quite obvious in places. Given more time I would love to address this seam or at the very least mask it with more ivy or vegetation.
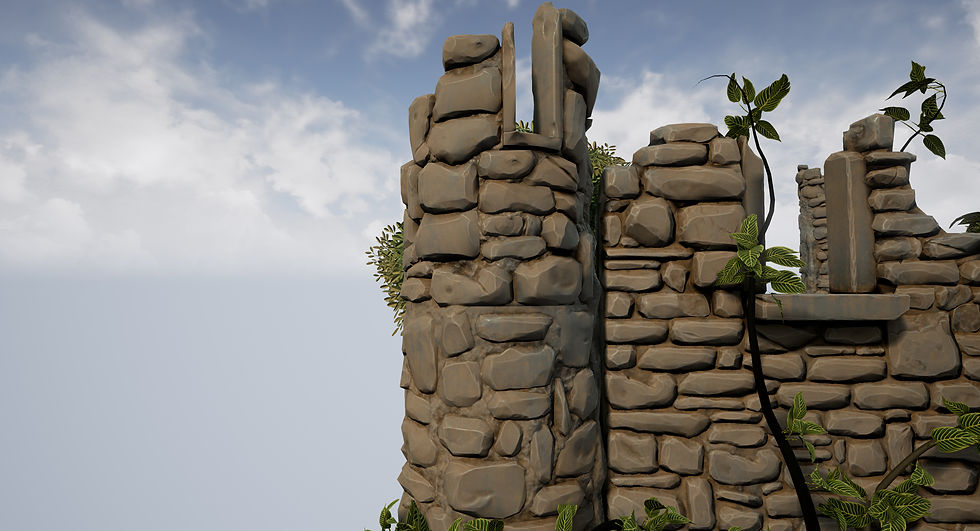

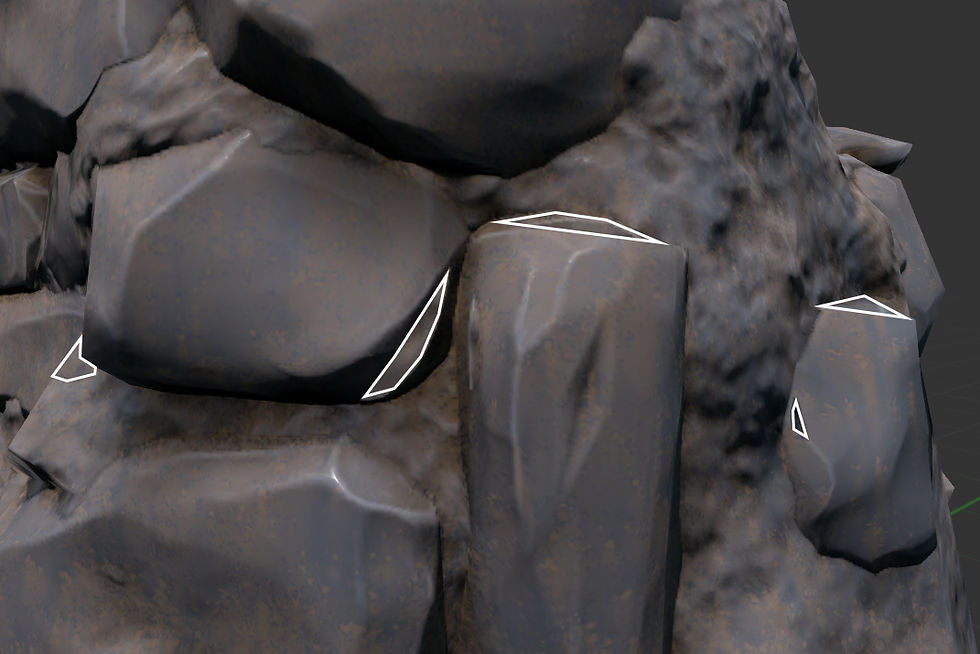
The next aspect of the round towers that I would change given the time are the various baking errors that emerged throughout the process. In specific areas there is not enough resolution to mimic the high resolution model and the difference is very obvious (as seen below). This could be fixed by simply adding more resolution, or my ensuring the low poly decimated mesh has the resolution in the correct areas. This was neglected at the time due to time constraints, and the result is a bit sloppy.