 |  |  |  |  |  |  |
|---|---|---|---|---|---|---|
 |  |  |  |  |  |  |
 |  |  |  |  |  |  |
 |  |  |  |  |  |  |
 |  |  |  |  |  |  |
 |  |  |  |  |  |  |
 |  |  |  |  |  |  |
 |  |  |  |  |  |  |
 |  |  |  |  |  |  |
 |  |  |  |  |  |  |
 |  |  |  |  |  |  |
 |  |  |  |  |  |  |
 |  |  |  |  |  |  |
 |  |  |  |  |  |  |
 |  |  |  |  |  |  |
 |  |  |  |  |  |  |
 |  |  |  |  |  |  |
 |  |  |  |  |  |  |
 |  |  |  |  |  |  |
 |  |  |  |  |  |  |
 |  |  |  |  |  |  |
 |  |  |  |  |  |  |
 |  |  |  |  |  |  |
 |  |  |  |  |  |  |
Modularity

Intro to Modularity
Modularity has, and will always be an integral part of creating environments for video games. The benefits to creating modular pieces and assembling them in engine are incredibly vast, and as a result almost every game in existence uses this system when creating their worlds. The necessity for modularity typically comes from the scale of the environment - creating one asset and re-using it throughout the environment is undeniably more efficient in terms of time and man-hours, but modularity is also much more efficient in engine as the asset only needs to be loaded into memory once, and simply refreshed for each instance. Thus, modularity not only benefits the speed at which an environment can be assembled, but also its efficiency during run-time.
Indeed, the use of modularity is important in every type of game, but it becomes increasingly important when a game's scale reaches a certain size. As a result, many open world games have perfected the use of modularity, and were a constant source of inspiration throughout the course of the project. I drew particular inspiration from Fallout 4 and The Elder Scrolls V: Skyrim's approach.
Joel Burgess of Bethesda Game Studios describes the approach in detail at the Game Developer Conference (GDC) in 2016. Burgess compares the modular game pieces to Lego blocks⁷ , and describes how using a uniform and prespecified footprint in the beginning of your project allows for the quick and easy snapping of modules throughout the course of the project. "The design of a Lego brick is highly specific, and that specificity is what permits it to work as a part of a system.". By predetermining the proportions of this footprint (i.e, the modelling grid), the modules naturally snap together, and work cohesively within the same system. Burgess describes the base footprint used by their team throughout the project was an equilateral cube of 256 dimension. Due to my architectural background, however, I found it much easier to divide my equilateral cube into real-world units, and so the base cube from which I created the majority of my assets was a 1m cube, which I could then divide down into 10 modular units. The grid was then set to 10cm increments, and assets typically conformed to this measurement.


1m = 100cm
1m = 10 modular units
Predefining this modular footprint prior to the modelling process was incredibly important, as each asset created in this way could be quickly and easily assembled in engine without a need for specific pieces. That said, not everything in environment could revolve around this module, as some assets needed to be more organic or specific scaling options were better suited, and thus this measurement was a guide rather than a strict rule.
Joel Burgess also discusses a similar modular approach in the creation of worlds in Skyrim and Fallout 3 on his own website⁸. He presents this modular approach in the form of a piping system, which draws striking parallels to the gutter system I used within my environment, despite the fact they use a different scale module. This confirms that the scale of the modular system is not the priority, but that each asset sticks to the same system. This would be particularly important in a team, where multiple artists work on assets that must snap together seamlessly.

Fig 5.169 - Fallout 3 Pipe Kit from Joel Burgess' website

Fig 5.170 - Gutter kit from my abandoned theme park

Example 01
Ticket Booth


x2
x2
x4
x2
x1
x4
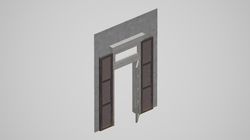
This is an example of how a couple of modular elements, constructed using the same grid, can quickly snap together to form a ticket booth. Most of the assets are re-used within this one ticket booth, and many are even reused throughout the rest of the environment.
x2

Example 02
The Veranda


x1
x1
x1
x1
x1
x1
x1
x1
x8
x1
x3
x1
x6
x2
x5
x8
x4
The facade of The Veranda building is an example of a much larger collection of modular pieces assembling to create one of the most important buildings in the environment. Because each asset was created with every other asset in mind, and revolves around the predefined grid, each asset can still snap together in engine very quickly. Here, the benefits of modular construction become evident. Some meshes, like the balcony floor get used in eight different places without the need for eight separate meshes.This not only expedites the modelling and assembly process, but it is also more efficient in game as it only needs to be loaded into memory once.
During the modelling process I experimented with breaking each of these modules down even further and grouping them in engine via blueprints, Unreal Engine's propitiatory scripting system. As you can see from the image above, the mesh for each of the doors and windows is its own separate mesh, and not duplicated anywhere else, despite sharing similar attributes. While they are assembled in Maya using the same modular system as the rest of the scene (Fig 6.1), the process of importing each individual piece became tedious and very time consuming, particularly when organising pivot points and ensuring they aligned to the grid perfectly. Thus, I decided to group these assets in Maya before hand, and export them as one solid mesh each (Fig 6.2). This is obviously not very efficient in game as the engine has to load numerous similar meshes, but it was a trade-off between efficiency and time. On reflection I should have dedicated the necessary time to optimising these meshes, but given the small size of each mesh and that they all share a mutual material, the savings in engine would be minuscule.

Fig 6.1 - Separate pieces in Maya

Fig 6.2 - Exported as one mesh. Not very efficient.

Example 03
Lockers

x2
x1
x1
x1
x2
x4
x1
x1

While the modular elements of The Veranda demonstrated how exporting large meshes from Maya was not very efficient, the above lockers demonstrate using Unreal Engine's Blueprints to assemble smaller meshes into larger, more manageable pieces within the engine itself. This is more efficient, because Unreal Engine understands the similarities between each mesh, and it does not need to load duplicate pieces unnecessarily. The most noticeable benefit, however, is that the meshes can be re-assembled in various ways within the game engine, creating numerous variations quickly, easily and efficiently, demonstrated below (Fig 7.1). This highlights the prosperity of modularity clearly, particularly in the context of a game environment (Fig 7.2 and Fig 7.3).


Fig 7.1 (above) - Modular Blueprint assembly.

Lockers in Context 01

Lockers in Context 02

Lockers in Context 01

The issue with modularity
In summation, modularity is incredibly valuable when constructing a game environment. Not only does it benefit the engine, allowing games to run smother, but it also makes assembly and re-use far more efficient. But there are some major drawbacks to constraining artists to a modular kit. The biggest barrier with modularity has to be the monotonous and repetitive aesthetic of the design. When confined to a predefined kit of parts, it becomes increasingly difficult to add variation to your models as repetition of assets is paramount to the modular system, as visible from the repetition of the modular ticket booths discussed previously (Fig 8.1, 8.2 and 8.3 below). When duplicated, repetition becomes evident, and the illusion of realism is broken. This issue plagues every game using modularity. This project uses a variety of techniques to minimise the appearance of repetition, discussed later in this retrospective.

Drawbacks of modularity - clear repetition

Drawbacks of modularity - clear repetition

Drawbacks of modularity - clear repetition

Drawbacks of modularity - clear repetition

References
⁷ Burgess, J. (2016) ‘Fallout 4’s’ Modular Level Design, 4:53 Available at: http://www.gdcvault.com/play/1023202/-Fallout-4-s-Modular / (Accessed: 4 December 2016).
⁸ Burgess, J. (2013) Skyrim’s modular level design. Available at: http://blog.joelburgess.com/2013/04/skyrims-modular-level-design-gdc-2013.html (Accessed: 4 December 2016).